Showing posts with label Artist Inks. Show all posts

Sunday, 28 October 2018

--- Kitaholic Kits DT --- "Zed" Scrapbook layout + process video

Hi Scrap Friends

Welcome along to my blog today.
I'm so pleased to be sharing inspiration for 


Here is my layout
"Zed"


The inspiration for this page was the Mixed Media Kit featuring the fabulous Colour Blast Artists Inks in "Citrus", "Marine" and "Sunburnt".

I decided that I wanted to make a water colour background, but I didn't want it to be solid colour.
So I took some old washi tape and taped off sections of white cardstock.

I then added the artists inks firstly in Citrus and Sunburnt, sprayed with water and dried with heat gun.
I left it overnight to make sure it was completely dry then repeated the process with Marine and Citrus.


After it dried, I removed the washi tape and got this awesome stripey background.
I decided to trim it and mount it on  black cardstock.

The rest of the page is just layering embellishments with some stitching and a couple of black ink splatters to finish it off.

Thanks for visiting.
Happy Scrapping.


Tuesday, 3 July 2018

--- Colour Blast DT --- "Watch me Grow" Scrapbook Layout + process video

Hi Scrap Friends

Today I'm sharing a new project for Colour Blast

"Watch me Grow"


For this page I've used the following

Colour Artist Inks Calypso
Colour Artist Inks Mermaid
Colour Artist Inks Soot

***

Firstly I've used a stencil and smoothed some White heavy gesso through it.
I focused on two different areas - the left side and right side and wanted a triangle kind of effect.


I left it to dry naturally overnight - a heat gun works also.
Once it's completely dry, I've dripped some Colour Artist Inks Mermaid and used water to help it move into the gaps  - some I want to soak into the paper and some will sit on the gesso.


Repeat the process with Colour Artist Inks Calypso.


Finally I added a very small amount of Colour Artist Inks Soot and again added some water to help it move.


I love how this background looks! The inks move so nicely around the gesso and are almost like watercolour. 


It's at this point that I wonder what to do next.
I'm looking at the layout thinking about the shapes I've used - hexagons, triangle (square/rectangle photo) - I'm only missing circles.
So I grab some empty toilet rolls and dip them in Black Heavy Gesso


With the little bit of left over Black Heavy Gesso I add some water and using a paint brush, add a couple of splatters around the page.


Finally I've added my photo - with paper cluster and title.
I struggled choosing a title and a position, but in the end, I love how the title suits the photo and has a lovely pop of contrast on the page.


***

You can see the whole process in the video below.


Thanks for visiting.
Happy Scrapping


Tuesday, 22 May 2018

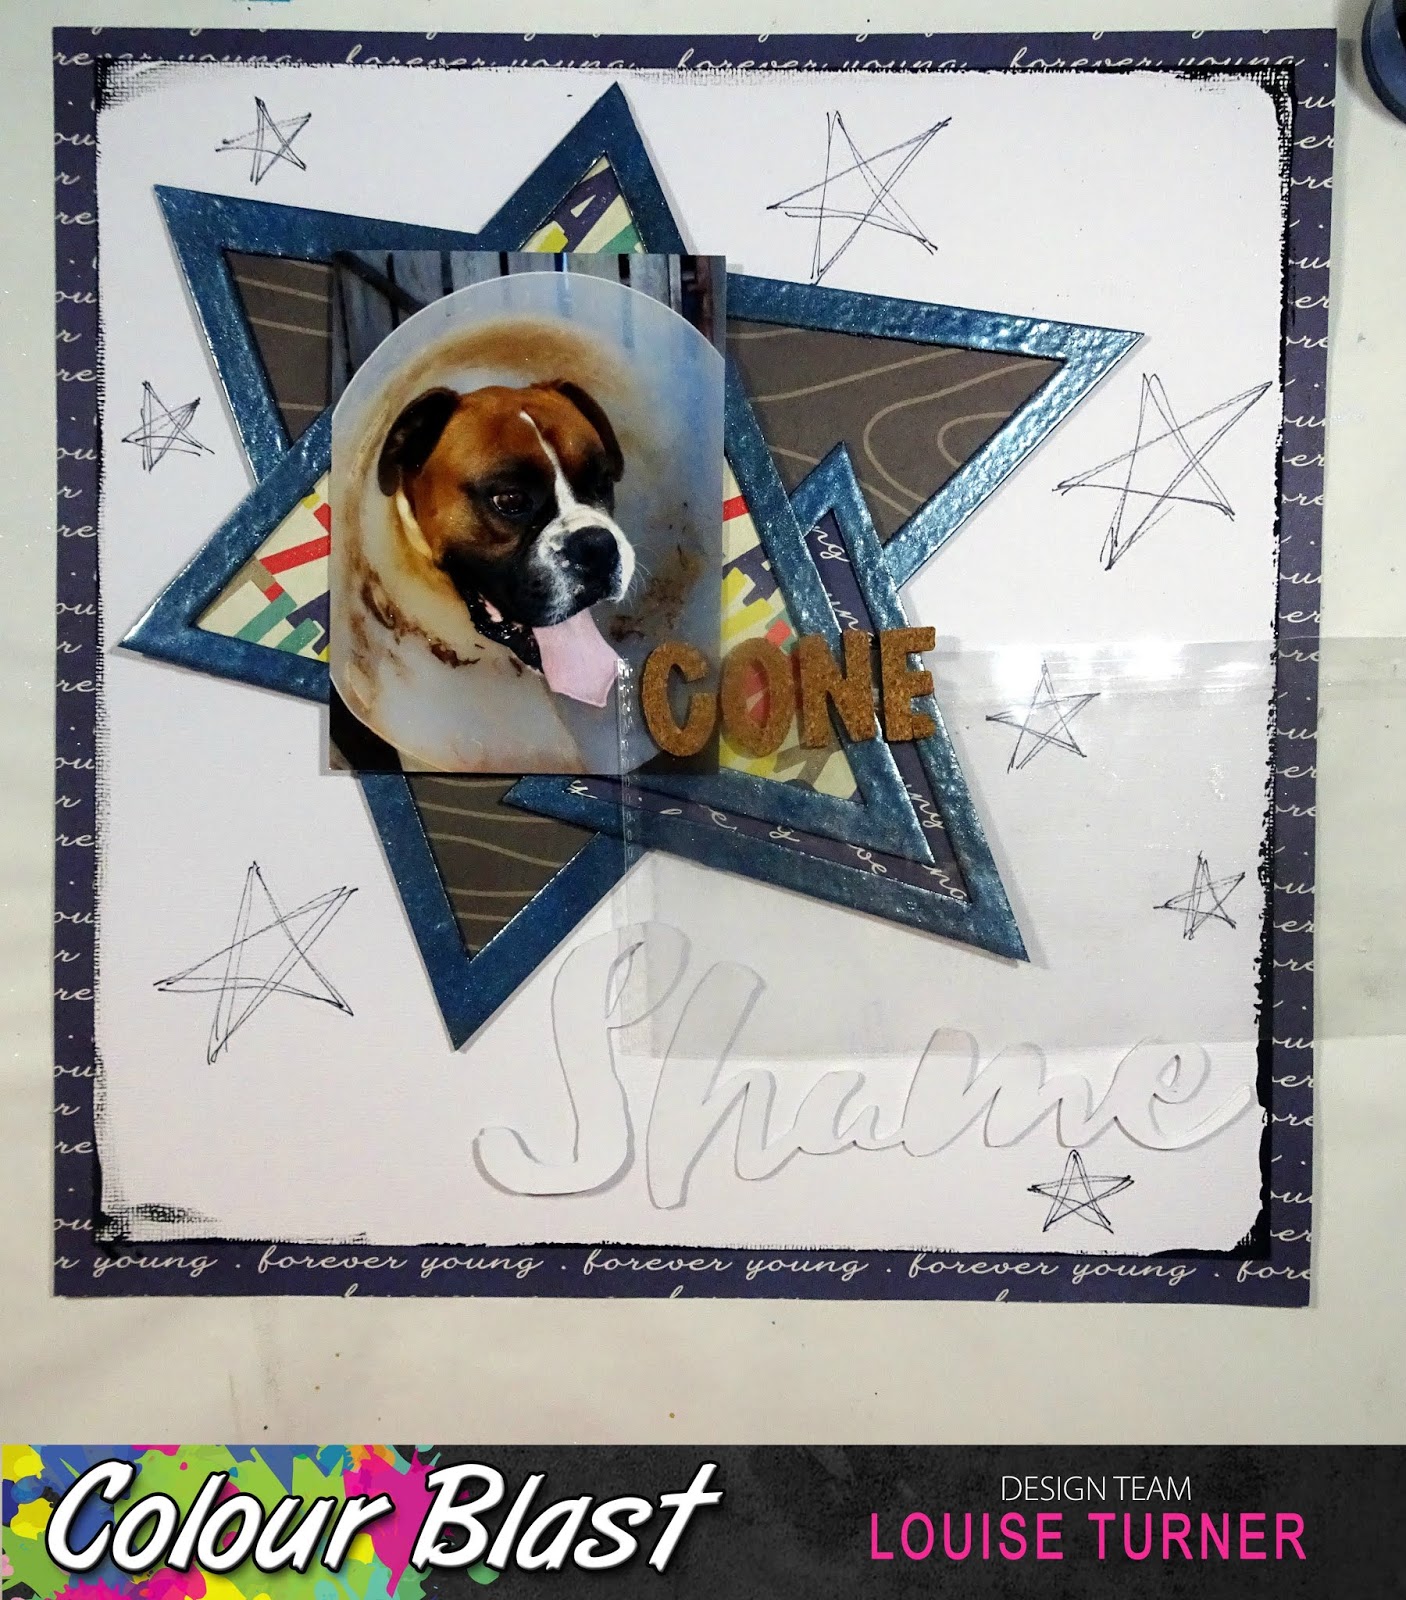
--- Colour Blast DT --- "Cone of Shame" Scrapbook layout + process video

Hi Scrap Friends

Today I'm sharing a new project for Colour Blast

"Cone of Shame"


For this page I've used the following

Colour Embossing Powder Deep Water & Singin the Blues
Colour Paste Steel
Colour Artist Inks Calypso

***

I started firstly with this photo that's been in my stash for awhile and I never really got the courage to scrap it.
Today was the day ...

I chose some chipboard pieces and teamed them with Colour Embossing Powder Deep Water & Singin the Blues


Next, I put together a background.
I didn't plan to back the triangles with patterned paper but that's how it ended up.


But it's all looking a little clean ...
Black heavy gesso to the rescue!
I created a messy border around the outside of the white cardstock.


I have a bit of a star theme going on, so I decided to roll with it and hand draw some stars on my bckground.


Then I painted the stars with Colour Artist Inks Calypso - I like them to be a little messy and outside the lines.


I've used my Silhouette to create the word "Shame".
I wanted to use the colour paste in a slightly different way and see what hapenned.

So I spread some on my craft mat, added a little water and then used a paint brush to add the paste to the title.


You can see it's created this really cool textured finish - the photo doesn't do it justice.
You should definitely give this a go, it's such a cool result.

***

Here is the layout "The cone of Shame"


and some close ups ...


I'm so pleased with the result - it definitely highlights the photo and I love how the title tells a great story.


 ***

You can see the whole process in the video below.


Thanks for visiting.
Happy Scrapping