Wednesday 28 February 2018

--- A2Z Scraplets DT --- "Smile and be happy" scrapbook layout

Hi Scrap Friends

Today I'm sharing a layout for A2Z Scraplets

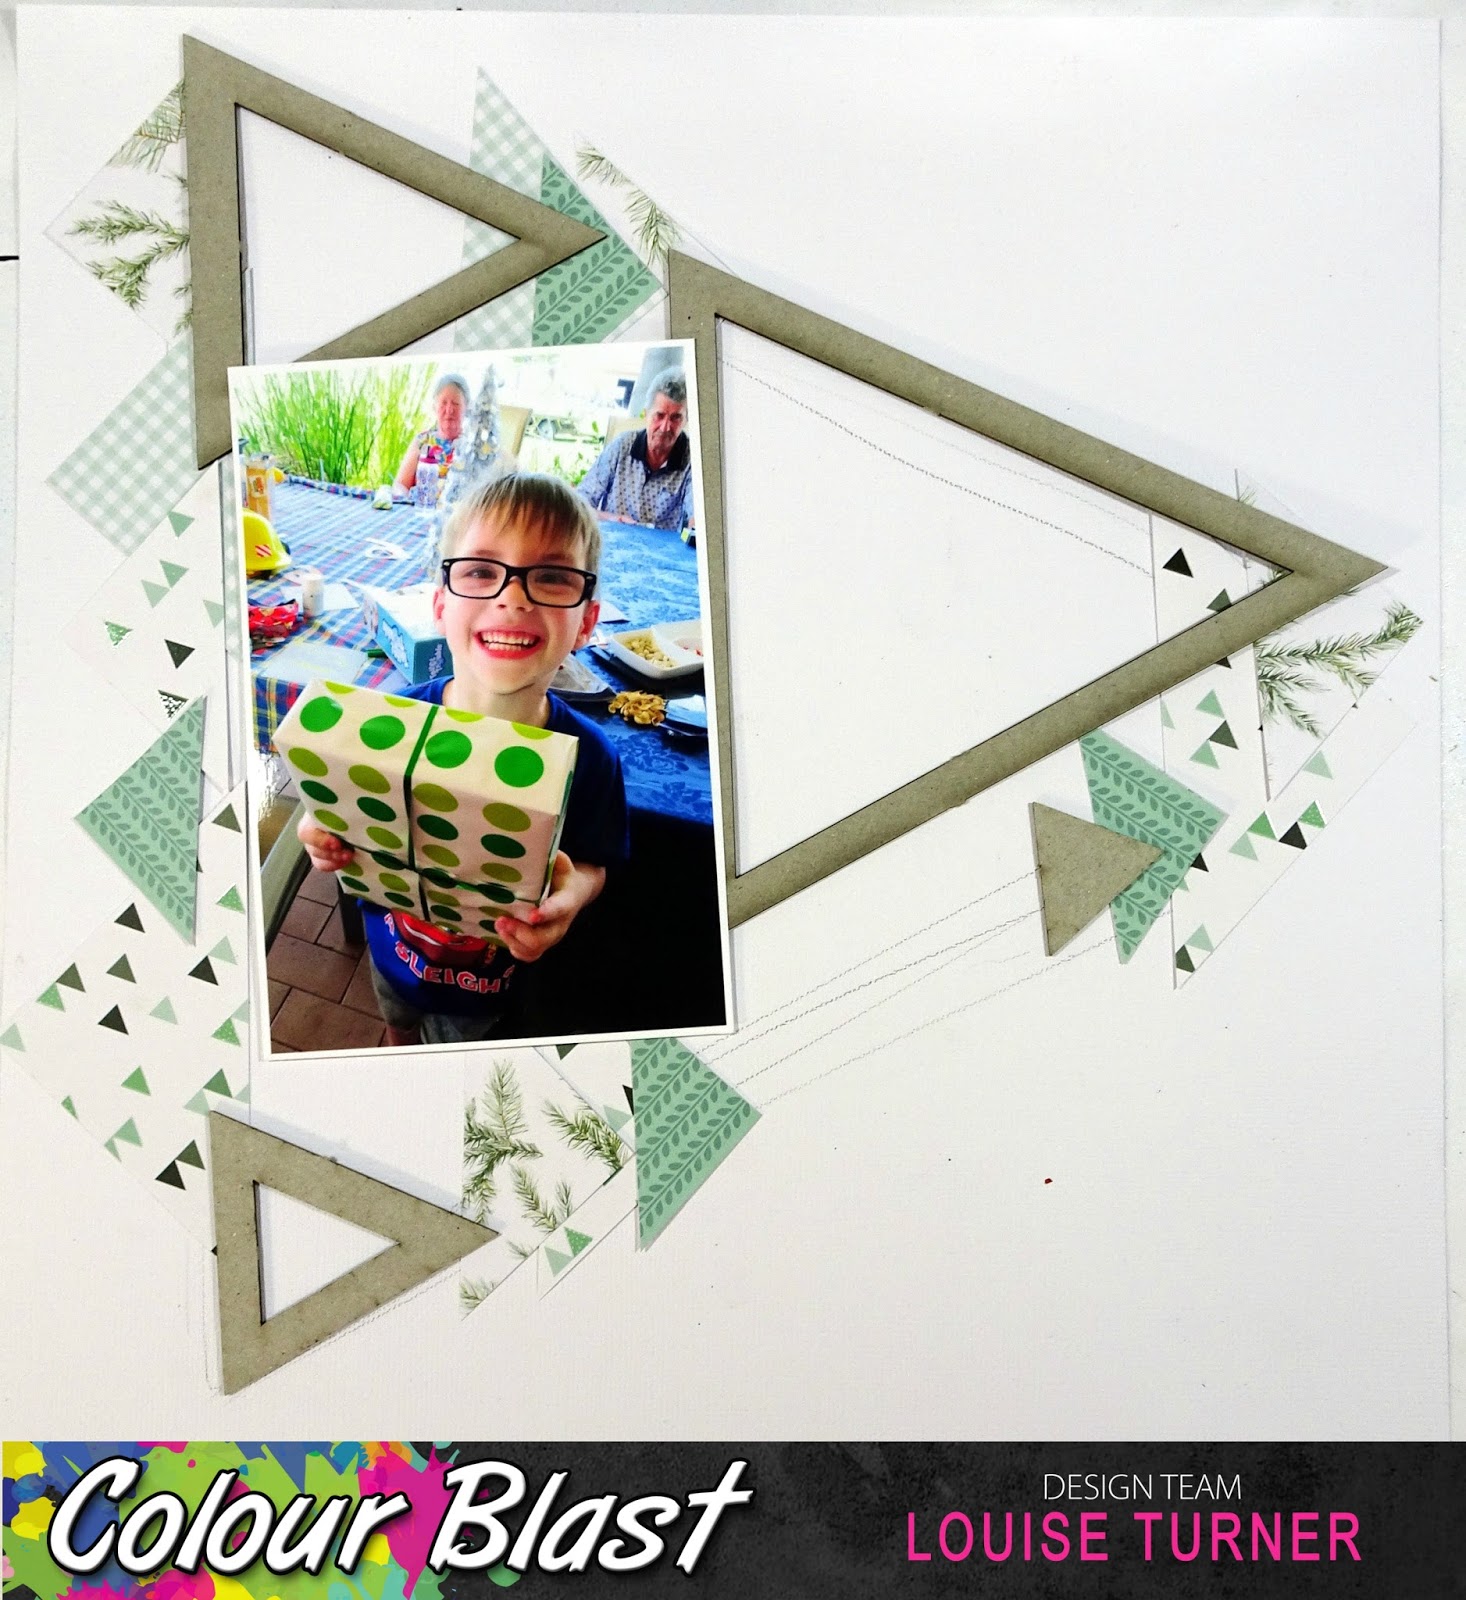
My layout "Smile and be happy"


This page is similar photo to a page I shared a couple of weeks ago.
This is Master Z graduating from Kindy!

I've used the Smile and be happy word
treated with Colour Blast embossing powder "Steel" on the raw chipboard.


I wanted the background to be "clean mixed media" - yep it's totally a thing.
So I've used Distress Ink, white splatters and tags to create layers.

I've also added the Frame 110 chipboard piece.


I love how chipboard looks in the background of layers. It's so great for adding texture.
I wanted a semi-raw chipboard feel, so added some stamping with the Distress Ink and a little bit of white gesso.


Thanks for visiting.
Happy Scrapping. 

Tuesday 27 February 2018

--- Colour Blast DT --- "Heart Eye's" Scrapbook layout + process video

Hi Scrap Friends

Today I'm sharing a new project for Colour Blast

I'm sure it's not just me, but I've noticed lately that my style has gone from bright and bold to a more subtle colour palette.

I think this page is half way - bold colours but more subdued.
Would love to hear your thoughts ... 

"Heart Eyes"


2018 for me is about stash busting - so I dug out some papers and got creating.


Lately I've discovered a love for the reverse stencilling technique - so this page is to share that with you.


For this page I've used the following Colour Blast products

Colour Spray Rainforest
Colour Spray Carribean
Colour Shimmer Dust Amber
Colour Shimmer Dust Navy
  
***

I firstly chose the Colour Blast products to match the photo and papers.

Firstly I chose a stencil and grabbed a piece of 9x12 paper.


Spray through the stencil - liberally!


With what's left on the stencil - flip it over and print it onto a new piece of cardstock.


While I let that dry naturally, I'm going to colour a doily that I cut with the cameo.

I've sprayed it with Colour Spray Sunset


Once dry the colour needed a little bit of vibrance so I've used the Colour Shimmer Cube Tangareen Dream


I repeated the reverse stenciling process with the same stencil and Colour Spray Carribean
Then added some Tangereen Dream splatters.


Finally, I've added some background stamping, chosen a title and adhered my layers.


The title was looking a little white, so I've coloured it with Colour Shimmer Dust Navy


Here's another look at the final page.
I've also added some stickers and a doodled border.


You can see the whole process in the video below.


Thanks for visiting.
Happy Scrapping


Wednesday 21 February 2018

--- A2Z Scraplets DT --- "Hello Amazing You" Scrapbook layout (Australia Day)

Hi Scrap Friends

Today I'm sharing a layout for A2Z Scraplets

My layout "Hello Amazing You"


This page features two chipboards I've combined into one title.


Firstly I gave them a coat of white gesso, then coloured with my distress crayons.
Being an Australia Day layout, I coloured the chipboard sort of like the Australian Flag.


This page features a Kaisercraft background paper which I've sprayed with Colour Blast spray in "Carribean" - leaving a lovely resist result.

I've embellished lightly with a border of washi and some small paper items.

Thanks for visiting.
Happy Scrapping. 

Saturday 17 February 2018

--- Scrapbook Boutique DT --- "Adventure" Scrapbook Layout + process video

 Hi Scrap Friends

Today I've got a layout to share for Scrapbook Boutique 

"Adventure"


This page features the fabulous Pink Paislee Wild Child.


I knew that the colours and patterns of this collection would make a great boys page.


I created the background using Distress Oxide in "Cracked Pistachio" and "Broken China" with the packaging technique and water.


As with most of my pages, I love to journal the story.
This one is quite funny.
We'd recently had some new tyres put on our car, Master C was fascinated by the process and decided he wanted to put new tyres on his truck.
This photo is the result ... 
I just love the feet sticking out the end :) 


You can find all of these products at


Here is the process video if you'd like to watch .


Thanks for visiting.


Products used: 


Pink Paislee 6x6 Inch S/S Paper Pad 36 Pack - Wild Child - Boy
Shop at:
Scrapbook Boutique
Dazzles Stickers 7.75 Inch X9 Inch 2 Pack Words-Black
Shop at:
Scrapbook Boutique
American Crafts 12x12 Inch Textured Cardstock - White
Shop at:
Scrapbook Boutique
Ranger Archival Ink Pad - Jet Black
Shop at:
Scrapbook Boutique
Universal Crafts - Round Ink Blending Tool With Foam (1 Inch)
Shop at:
Scrapbook Boutique
Pink Paislee - Cardstock Stickers 5.5X11 2 Pk - Wild Child, Boy - W/ Orange Foil
Shop at:
Scrapbook Boutique
Tim Holtz Distress Oxide Ink Pad - Broken China
Shop at:
Scrapbook Boutique
Tim Holtz Distress Oxide Ink Pad - Cracked Pistachio
Shop at:
Scrapbook Boutique
Scrapbook Adhesives 3D Foam Shapes - 20 Pcs - Frames
Shop at:
Scrapbook Boutique
Ranger Tim Holtz Distress Mini Ink Pad - Blueprint Sketch
Shop at:
Scrapbook Boutique
Tim Holtz Layered Stencil - Diamonds
Shop at:
Scrapbook Boutique
Katzelkraft Rubber Stamp - Clock A6
Shop at:
Scrapbook Boutique

Wednesday 14 February 2018

--- A2Z Scraplets DT --- "Dream Believe" Scrapbook Layout

Hi Scrap Friends

Today I'm sharing a layout for A2Z Scraplets

My layout "Dream Believe"


This page features the "Dream, Believe" chipboard.
I've left it raw and then sprayed it with the Colour Blast "Indigo" spray.
This has given it a more "Navy" feel rather than Indigo because of the raw chipboard.


I've also used the Swirly Frame chipboard.
Simply coated with white gesso and Colour Blast embossing powder "Snow White".


I've used the My Minds Eye "Blush" collection for this layout.
The background paper had a coat of clear gesso, then I added lots of splatters using different size brushes of Colour Blast shimmer spray in "Steel"


A little bit of background stamping, some journalling and stickers finish this layout nicely!


Thanks for visiting.
Happy Scrapping. 

Tuesday 13 February 2018

--- Colour Blast DT --- "Boyish Charms" Scrapbook layout + process video

Hi Scrap Friends

Today I'm sharing a new project for Colour Blast

"Boyish Charm"


For this page I've used the following

Colour Shimmer Spray Apple of my Eye
Colour Shimmer Spray Envy
Colour Embossing Powder Apple of my eye

I grabbed some fabulous A2Z Scraplets chipboard triangles as my inspiration for this page.

  ***

I've gathered some patterned paper, used the trimmer to cut into triangles,
the Colour Blast Shimmer sprays - I wanted subtle background colour on white and
Apple of my eye embossing powder for my chipboard.


Using the triangle chipboard, trace a triangle onto the page.


I layed out the elements first to give me an idea of where to put the colour.


Using the packaging technique, I've added  Apple of my Eye and  Envy
to the background.


While that dries naturally, I've added two coats of embossing powder to my chipboard pieces.


Then I've had a little more fiddling around with embellishments, stickers and texture (rug mesh).


Before adding some journalling and adhering all the elements.


***


You can see the whole process in the video below.


Thanks for visiting.
Happy Scrapping