Showing posts with label Colour Artists Inks. Show all posts

Wednesday, 5 September 2018

--- Off the Rails Scrapbooking DT --- September challenge inspiration layout

Hi Scrap Friends

Today I'm sharing my inspiration for the September moodboard over at

"School Lunches Blah"


I'm not going to lie. I found this food challenge quite difficult.


Firstly I chose my photo. While looking through my printed photos, I found this one of the first ever school lunches I made back in January.
It was kind of exciting at the time, but now I look forward to tuckshop days when I don't have to make lunches ... and I've still got to do this for twelve more years!!!!!

So I decided to make that the story of my layout.
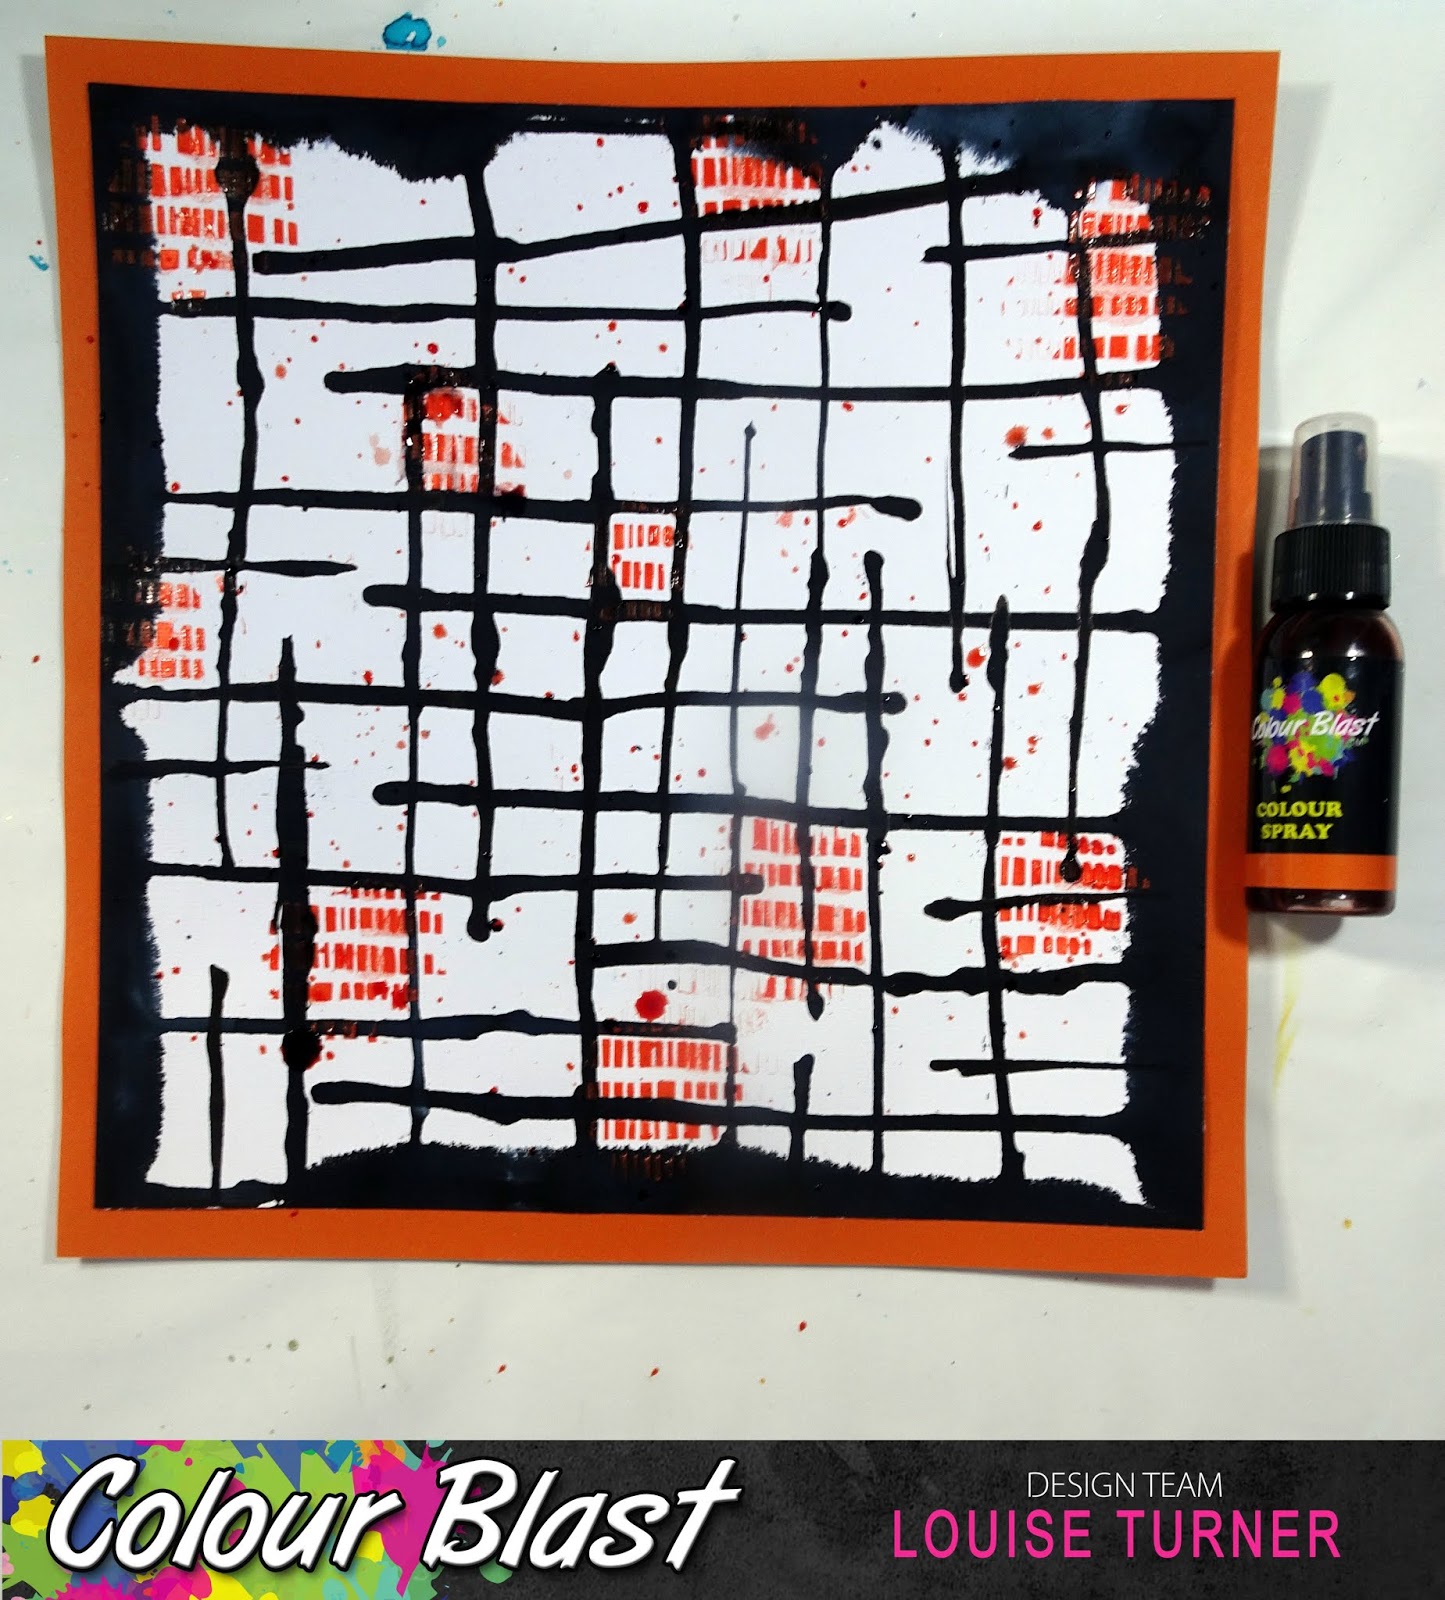
The colour inspiration came from the little cupcake embellishment - I wouldn't normally have used it but for this page, it was perfect.

You can see and hear all about my process in this video.


Thanks for visiting.

Happy Scrapping.


Louise xo

Tuesday, 3 July 2018

--- Colour Blast DT --- "Watch me Grow" Scrapbook Layout + process video

Hi Scrap Friends

Today I'm sharing a new project for Colour Blast

"Watch me Grow"


For this page I've used the following

Colour Artist Inks Calypso
Colour Artist Inks Mermaid
Colour Artist Inks Soot

***

Firstly I've used a stencil and smoothed some White heavy gesso through it.
I focused on two different areas - the left side and right side and wanted a triangle kind of effect.


I left it to dry naturally overnight - a heat gun works also.
Once it's completely dry, I've dripped some Colour Artist Inks Mermaid and used water to help it move into the gaps  - some I want to soak into the paper and some will sit on the gesso.


Repeat the process with Colour Artist Inks Calypso.


Finally I added a very small amount of Colour Artist Inks Soot and again added some water to help it move.


I love how this background looks! The inks move so nicely around the gesso and are almost like watercolour. 


It's at this point that I wonder what to do next.
I'm looking at the layout thinking about the shapes I've used - hexagons, triangle (square/rectangle photo) - I'm only missing circles.
So I grab some empty toilet rolls and dip them in Black Heavy Gesso


With the little bit of left over Black Heavy Gesso I add some water and using a paint brush, add a couple of splatters around the page.


Finally I've added my photo - with paper cluster and title.
I struggled choosing a title and a position, but in the end, I love how the title suits the photo and has a lovely pop of contrast on the page.


***

You can see the whole process in the video below.


Thanks for visiting.
Happy Scrapping


Tuesday, 19 June 2018

--- Colour Blast DT --- "All the Good Things" Scrapbook Layout + process video

Hi Scrap Friends

Today I'm sharing a new project for Colour Blast

"All the Good Things"


For this page, I've taken my inspiration from the awesome A2Z Scraplets chipboard arrow frames.


I also wanted to showcase one of my favourtie colour combinations - blue + yellow = green!


For this page I've used the following

Colour Spray Carribean
Colour Spray Saffron
Colour Embossing Powder SunshineApple of my eye and Just Blue
Colour Artist Ink Soot

***


Normally I start by working on my layout and I do like a horizontal page.
So to challenge my creativity I decided to work vertically.
I layed out the photos and the chipboard pieces down either side of my page.


I knew that my colour combo was going to be blue, yellow and green so I embossed each chipboard piece a different colour using the Colour Embossing Powder SunshineApple of my eye and Just Blue.


I started with a white 12x12 cardstock background - no gesso required.
I used sprays Colour Spray Carribean and Saffron by spraying them onto packaging then smudging onto the layout.
While the spray is still wet, repeat with the alternate colour and they combine to make the three colours.


The background just needed something a little more, so I searched through my stash and came across this arrow stencil.
Then I added some splatters of Colour Artist Ink Soot.


I'd already selected the large title and kept the embellishing very minimal.


***

You can see the whole process in the video below.


Thanks for visiting.
Happy Scrapping


Tuesday, 5 June 2018

--- Colour Blast DT --- "Friends' Scrapbook Layout + process video

Hi Scrap Friends

Today I'm sharing a new project for Colour Blast

"Friends"


This page (for me at least) is VERY mixed media!!!


I've used the following

Colour Artists Ink Soot
Colour Spray Rainforest
Colour Shimmer Dust Lust
Colour Spray Sunset
Colour Paste Tangareen Dream


***

I firstly chose a photo - the little pop of orange in the picture was my inspiration for the pop of orange on this layout.


The Colour Artists Ink come with a dropper - so I wanted to use this to make my background.
I've lightly sprayed the edge of the page with water and then used the dropper to add colour and let it run.


As each layer dries, rotate the page and repeat.
I let the ink dry naturally overnight and then added some Colour Paste Tangareen Dream through a stencil in some of the square areas of the ink drips.


To help with the flow of my orange theme, I've trimmed the outside of the inked cardstock and mounted it on orange.
I also added some background splatters with Colour Spray Sunset


While playing around with the layout, I decided I needed to frame the photo.
I pulled out a chipboard circle and added some White Heavy Gesso


I thought about embossing, but decided to pull a little of the green from the elements of the paper collection I've used and firstly painted the chipboard with Colour Spray Rainforest.


It just wasn't green enough so I then coloured it with the Colour Shimmer Dust Lust  - much better!


Finally, I've added some diamontes, wood veneer, flair and cheeseclothe.


This is so different to my normal creations but I love how it turned out.


***

You can see the whole process in the video below.


Thanks for visiting.
Happy Scrapping